In my wavy hair curl patterns blog post I mentioned that some people claim that wavy hair starts around the ears, while curly hair starts at the roots. I explained how this isn’t necessarily true. Sometimes curly hair starts lower, and sometimes wavy hair starts higher.
Some of it can depend on your hair type, but it also can depend on several other factors including the techniques that you’re using in your routine.
If you have hair that is only wavy at the bottom or wavy hair that starts at the ears and you want to get your pattern to start higher, this post is for you!
How to get your curl pattern to start closer to your roots
- Plopping.
- Microplopping.
- Diffusing instead of air drying.
- Using light products.
- Use fewer products.
- Clarify regularly.
- Consider a haircut.
- Damp styling instead of wet styling.
- Squish hair at the end of your shower.
- Upside down styling.
- Keeping your moisture-protein balance in check.
- Use a product with strong hold.
- Get a gel cast.
If you want your curl pattern to start closer to your roots, you have to avoid letting your hair get weighed down by water or products. There are several techniques you can use to work on this!
- Plopping. If you scrunch your hair in the shower and have waves starting higher up, but then minutes after stepping out of the shower, your roots have gone straight, plopping can help! Check out my how to plop your hair post to learn how to do this if it’s new to you.
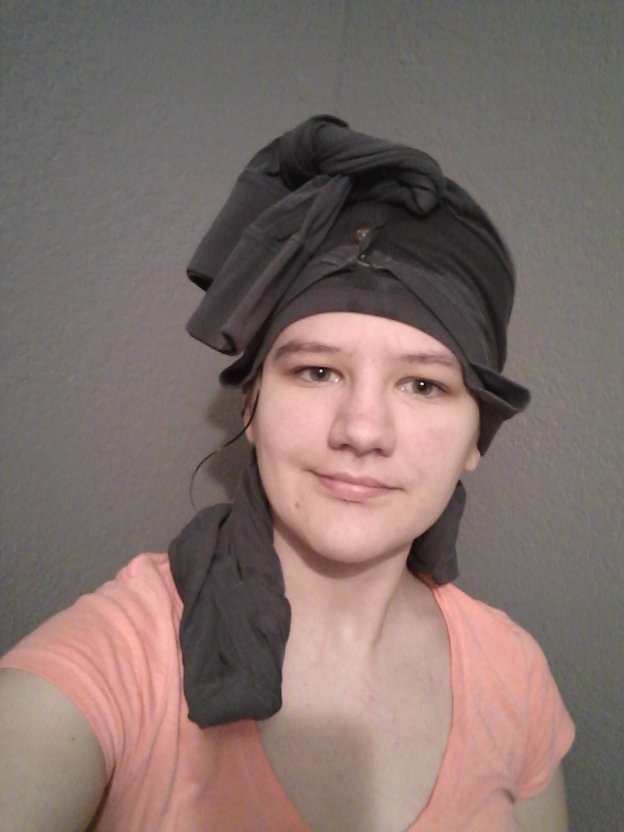
- Microplopping. Microplopping can also help you avoid your roots being weighed down by water. If you find that plopping even for a short period of time leaves your hair in weird patterns, microplopping might work better for you. I have a microplopping tutorial post if you need to learn how to do it.

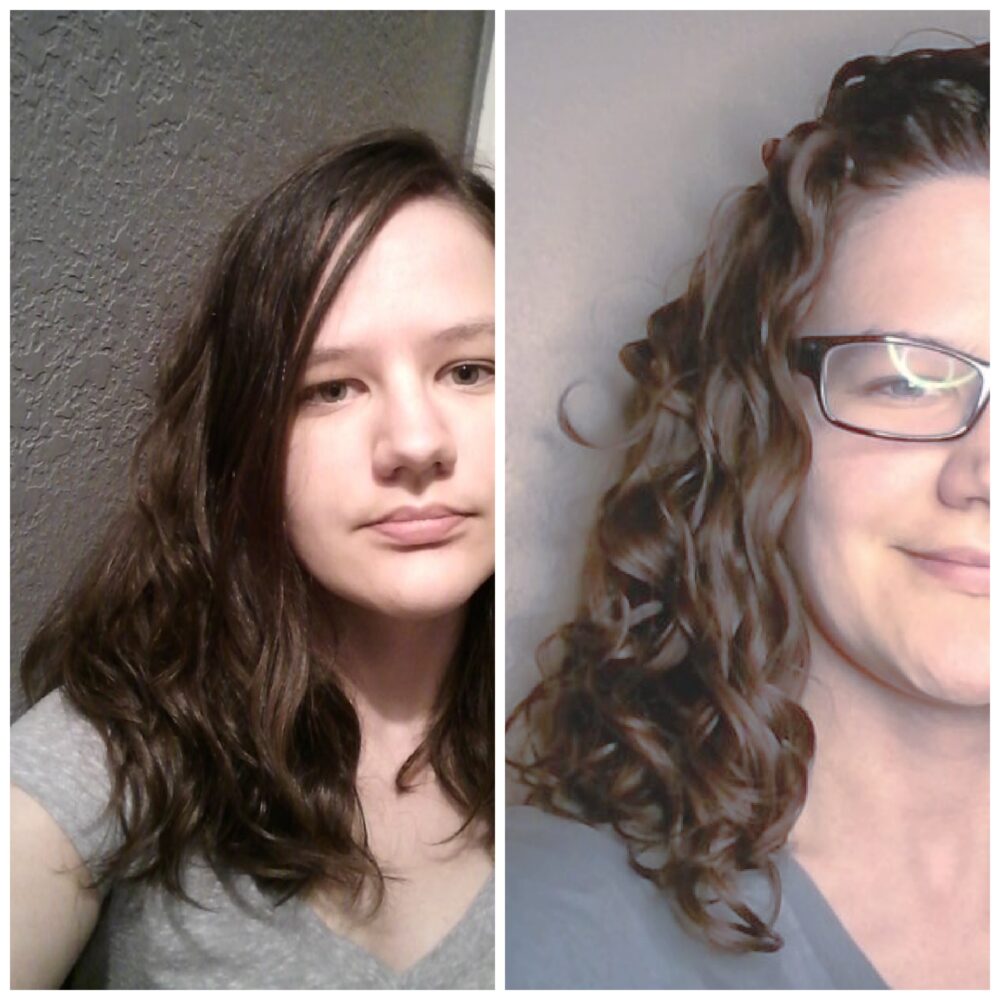
(air dry on left, diffused on right)
- Diffuse your hair instead of air drying. Water in your hair can be quite heavy and pull your hair down, especially near the roots. If you air dry, that leaves water in your hair longer which gives it more time to stretch your hair out. Diffusing can get the water out faster, lessening the impact. I have a how to diffuse your hair blog post sharing four different diffusing styles!
- Use light hair products. If you’re using products that are too heavy for your hair, they could be weighing down your roots. Switching to lighter products can add more ‘bounce’ back to your hair, and you’ll likely see the difference higher on your head.
- Use fewer products. It’s easy to see others using 8 products on wash day and think you need to do the same. For many with wavy hair, using too many products will really weigh their hair down. Try cutting back to the absolute essentials to see if your hair springs up more.
- Use a smaller amount of the products you do use. Particularly with leave-in products like leave-in conditioners or creams, it’s easy to get weighed down if you use too much. For some products, the difference between using a dime sized amount and a nickel-sized amount may make a difference in how high up your hair pattern starts.
- Clarify. Sometimes build-up can cause roots to flatten or straighten. Clarifying regularly can ensure that your roots don’t get weighed down. How often you should clarify will depend on your hair, products and other factors so you’ll have to experiment and analyze your results to figure out how often your hair needs clarified. Check out my blog post on clarifying wavy hair to learn more.
- Consider a haircut. If you don’t have layers in your hair, this can cause weigh down. Simply adding layers can make a big difference in allowing your waves to curl up higher on your head.
- Damp styling. I find that if I style my hair damp (after plopping) instead of styling on soaking wet hair (immediately at the end of my shower), my hair pattern starts higher. See my blog post about wet styling vs damp styling to learn more.
- Squishing hair at the end of the shower. I squish to condish while in the shower, but after I turn the shower head off, I squish more to try to remove excess water before leaving the shower. This helps me get some water out and reduce weigh-down from water.
- Upside down styling. I get my pattern to start higher on my head when I style my hair upside down. I think this is caused by me getting product closer to my roots when styling upside down. So perhaps this bulletpoint should be titled ‘getting product to your roots’ more so than upside down styling. For me, it’s just really challenging to get product to my roots if I Style upright though. See my post upside down vs rightside up styling for more about my experiences with that.

The left is styled rightside up, the right is styled upside down. Both were diffused right-side up.
- Watch your protein-moisture balance. I have one side of my head that is just naturally looser textured than the other. My straighter side will start to only have waves at the ends if I am over-moisturized and needing protein. Keeping my protein-moisture balance in a good place assists with getting that side to curl higher up my head. When I use all of my regular ‘tricks’ and my pattern is still starting low, that is one of the ways I can tell it’s time for a protein treatment.
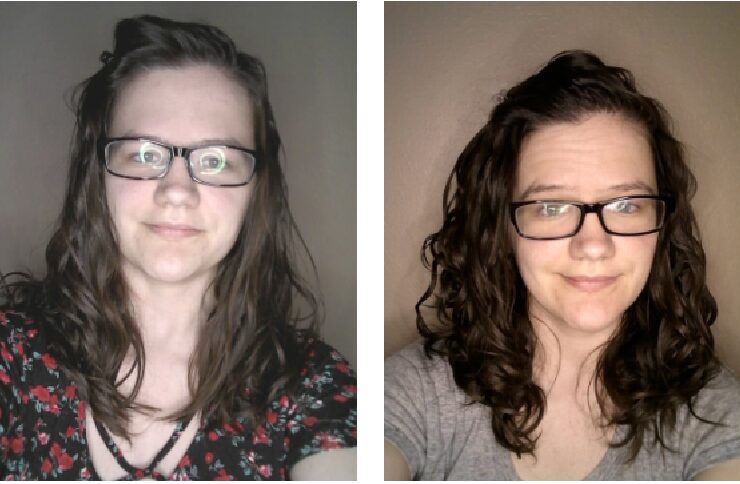
- Use a product with hold. If I don’t use a gel or a mousse with hard hold, I only will have texture at the very end of my hair. My hair needs the support from a product with hold in order to maintain its texture. Many assume gel has more hold but it really depends. See my post on gel or mousse for wavy hair to learn more.
Product-free on the left, just added mousse on the right!
Tips And Tricks for Getting Naturally Wavy Hair To Start At The Roots
I wanted to go into slightly more detail about a few of these techniques, because the details make a big difference in my own hair.
Plopping.
While plopping in general can be helpful for root volume, I think finding the sweet spot for how long to plop to encourage root volume is key. If I don’t plop for long enough, as soon as I take my plopping t-shirt off, my hair will start to fall start near the roots because there’s still lots of water in there to weigh it down.
If I plop for too long, my hair starts to be frizzy, and my clumps start to fall apart. It took trial and error to figure out that my ideal plopping time is usually about 15 minutes. It does vary some depending on what products I use, though.
Microplopping.
For some who get poor results from regular plopping, perhaps those who have quickly drying hair, microplopping right after their shower might help retain their pattern at the roots, without drying out their hair too much.
For me, it’s something I do after plopping and adding my mousse, to help my waves spring back up after I have applied product. However, I also regularly check my roots from the time I take my plopping t-shirt off, until my hair is done diffusing. Any time that I see that my roots have fallen flat, I’ll microplop to help my waves pop back up.
Most frequently, I microplop after applying my mousse, and then before switching to a new portion of my head while diffusing. For example, if I start diffusing the front left side of my head for about 5 minutes, and then want to switch to the front right section, I’ll check my roots and if they’ve fallen, I’ll microplop the front right section before I start diffusing that section.
If my roots are straight before I diffuse, then they’ll dry in that pattern. Making sure you have your pattern at the roots before you start diffusing is key.
Squishing hair at the end of my shower.
Immediately after your shower, before plopping is another key time to be mindful of what your roots look like. I want to squish to get waves high up my strands before I plop, so that we start out on the right foot.
Personally, I also like at least moderately thick clumps (not skinny ones). So I try to strike a balance of squishing enough to get my pattern to start high on my head, without squishing so much that my hair gets broken into teeny tiny clumps. If your ultimate goal is the fattest clumps possible, this tip may not be for you as it does require some balance.
Same thing with microplopping, as microplopping tends to break up my clumps somewhat too. Both of those come down to deciding how much you want your pattern to start higher vs how important big clumps are to you and finding a way to strike the ideal balance for your hair goals.
Getting a full-head cast.
Getting my waves to hang around requires a strong cast for me. It also requires full coverage. If I don’t get all of my hair covered in product (such as not getting products all the way up my strands) then wherever wasn’t covered in product won’t cast, and will fall flat.
This is part of why I prefer upside-down styling. I find it easier to get product up to my roots when styling upside down, which gives me a cast all the way up. If you struggle with this see my post how to create a gel cast.
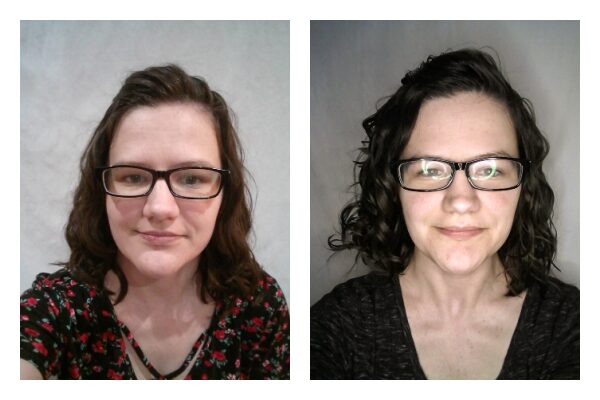
[…] the days when my hair starts higher on my head, it is still wavy, not curly. I have a post sharing how I get my waves to start higher on my head if you want to get your waves to start higher, […]