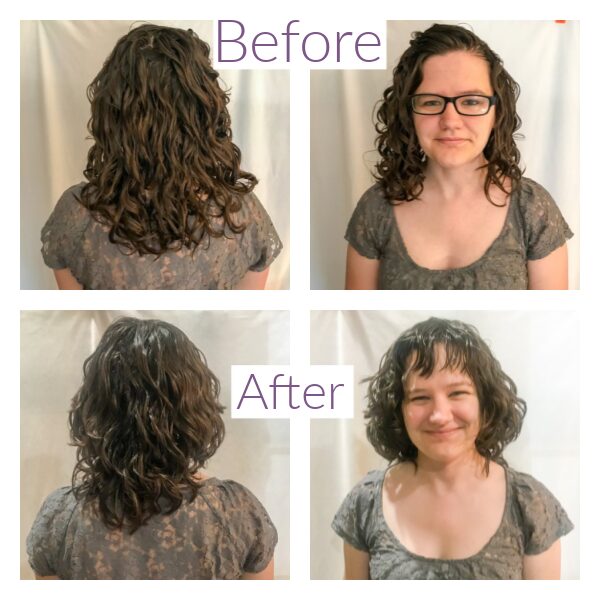
First, I want to say that I know my hair doesn’t seem especially short. I got a haircut a couple of months ago, and I only lost about 1-2 inches of length at the longest layer, so it doesn’t look much shorter than it used to be.
However, I got a lot of layers added in, and that has resulted in the shorter layers of my hair being much shorter than they used to be.
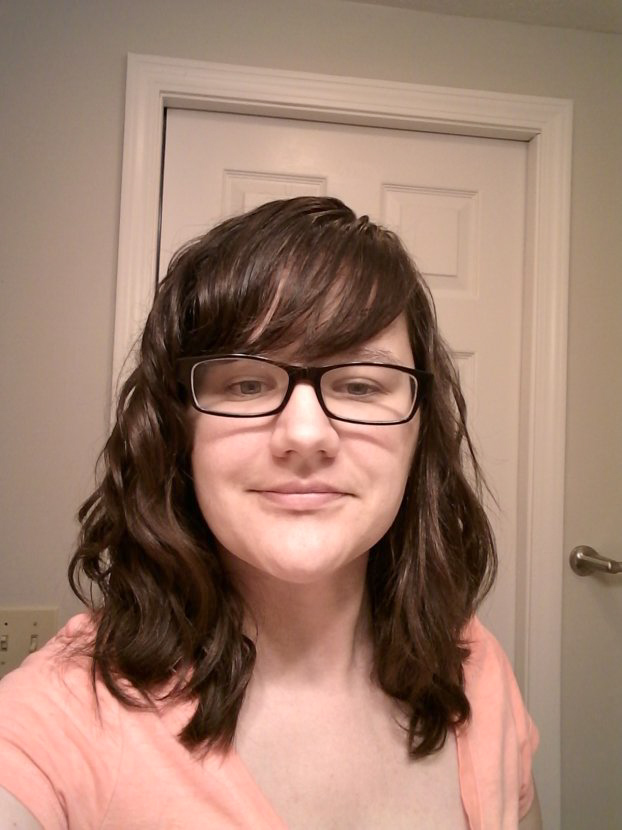
My shorter layers are about chin length. Because of those shorter layers, I can’t style my hair the way that I used to, and get results that I feel look good. Here is a collage showing my before and after. In the back the length difference is minimal, but on the sides, where I have shorter layers, it’s fairly significant. This is because I was given a shag-style haircut.
I used the same styling techniques in the ‘before’ and ‘after’. As I think you’ll probably agree, my old styling methods did not work as well with my new, shorter haircut!
I wasn’t in love with my haircut mostly because it just wasn’t what I had in mind. You can read more about that in these two posts if you’d like:
Getting a devacut on naturally wavy hair [my experience]
Dry curl cut on wavy hair advice
Anyway! Since getting a shag-style haircut, I’ve had to change up my regular routine. I used to do a lot of methods that encouraged volume. I did almost all of the methods listed in my post 13 methods to get more volume in wavy hair, post prior to my haircut.
After getting a shag haircut and having shorter hair (at least on the sides) I no longer liked the appearance I got when using techniques that aimed for ‘all the volume’. I felt like it resulted in ‘all the poof’ more so than ‘all the volume’.
My hair is growing out more now, but I thought I’d share the routine I’ve been using for shorter wavy hair, for those who have shorter hair and/or shag haircuts, this may work better for you than my other routines from when I had longer hair.
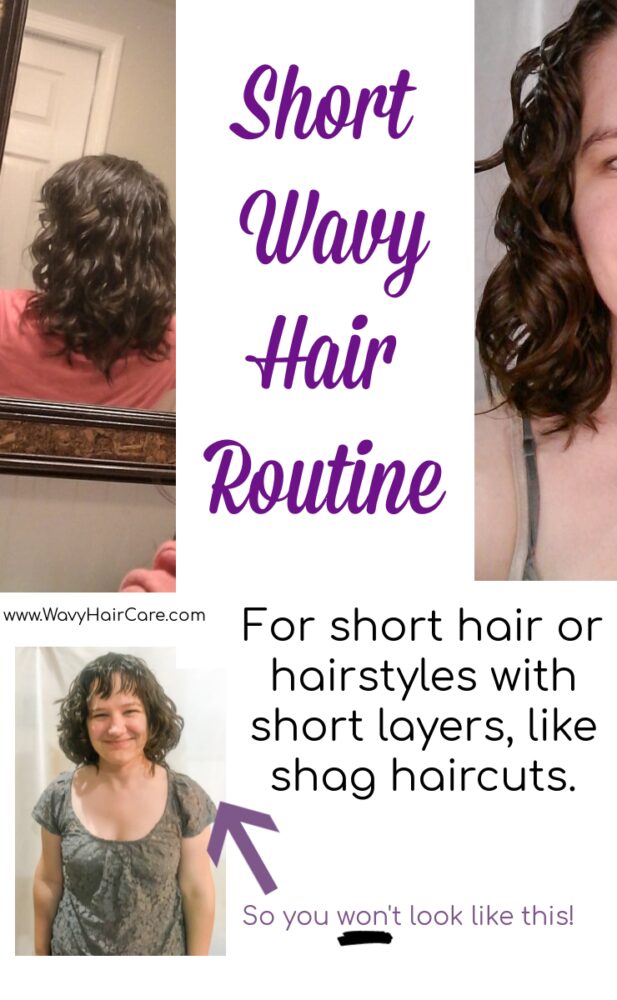
Wavy Hair Routine For Shorter Hair
- Apply shampoo to the scalp. Aim to lightly scrub your entire scalp with the shampoo. Rinse it out fully once done.
- Apply conditioner to your strands, avoiding your roots.
- With the conditioner in your hair, use a wide tooth comb to detangle and/or align your hair.
- Scrunch your hair, then leave it to sit with the conditioner in it for a couple of minutes to give it time to really work it’s magic.
- Add a little water, squish some more, add more water, squish some more, and so on until you have fully rinsed your hair (and scrunched it a lot!)
- Do the final rinse of your hair while your head is upside down under the shower head.
- Run your fingers along the back of your head, to help separate your hair from the back of your head (you don’t want it stuck tight to your scalp).
- Scrunch your hair to remove excess water.
- Plop your hair for about 10 minutes.
- If you have bangs and don’t want them to curl (mine never laid well when curly!) comb just your bangs out at this phase.
- Apply gel or mousse. I generally prefer mousse but sometimes use gel just to change it up.
- Diffuse hair until no more than 1/2 way dry, then air dry. If you have bangs that you’re wanting to keep straighter, comb them very now and again as they dry to help them stay straighter.
- Once fully dry, scrunch out the crunch.
Styling a Wavy Shag Haircut
The biggest change that I’ve made since getting my shag style haircut is only diffusing partially dry, rather than until almost fully dry. If I diffuse my hair until dry, it dries in a tighter curl pattern, which makes it shorter and wider on the sides. When I diffuse part way and then let it air dry, this elongates my curl pattern a bit more, making it less voluminous.
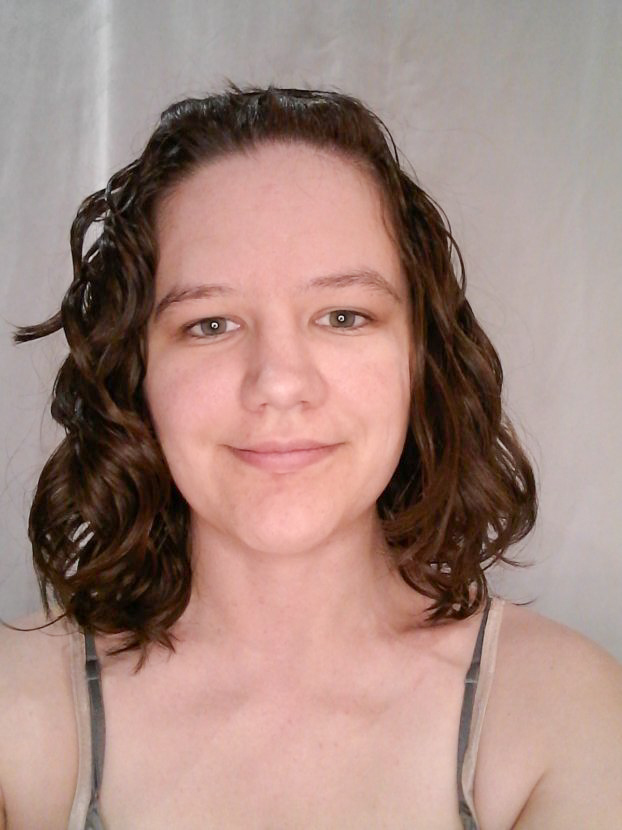
This was with just mousse and diffusing about 15 minutes (vs my normal 40 or so)
The other big change was trying to not let part of my hair (my bangs) curl up. I just could never get my bangs to look good or lay well while wavy. Instead, I opted to comb them after plopping and then a couple more times as they were in the process of drying to keep them straighter.
Once long enough, I started pinning my bangs back after they were dry, or trying to side-sweep them. This is just a style preference, I don’t like how I look with bangs even when they are straight.
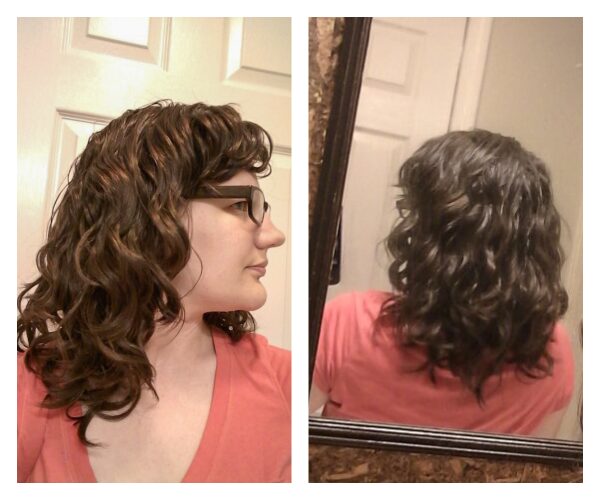
The photos in the collage above was a day when I just used mousse and diffused for about 6 minutes before letting it air dry the rest of the way.
Sometimes I only diffuse for 5-10 minutes, which probably only gets my hair to about 20% dry. While I used to prefer enhancing my waves and getting more volume, I don’t like those methods on my shorter hair.
Instead, I aim for less shrinkage. I’ve also experimented with using just a sea salt spray rather than a gel or mousse. Texturizing sprays are a lot different than gels or mousses, they offer a lot less hold, so they leave my hair looser and less defined than gel or mousse, by quite a large margin. However, with my shorter hair I am okay with that look sometimes.
This was a day where I just used sea salt spray and didn’t diffuse very long. I like how styling with just sea-salt spray looks on this haircut on day 1, but it falls apart really quickly on consecutive days.
If you have short wavy hair or a hairstyle that involves short layers such as a shag, I’d love to hear how you style your waves! Leave a comment sharing what techniques do and don’t work for you with shorter hair or shorter layers.
You really learned this haircut – so instructive to see how much of a difference the styling techniques make.
I really like the mousse version – especially the side-swept bangs and gorgeous wave clumps you are getting on the sides. I bet when the bangs are a bit longer, a curtain bang look will also be great.
Thank you! I am still eagerly waiting on it to grow out, as I still prefer my pre-haircut style over my current hairstyle. I see other women in wavy/curly groups who have shags that I think look great but it’s just not ‘me’.
That first time that I styled my own hair after my haircut and it was real poofy on the sides and the long in the back like a mullet-type style, I was thinking I would basically just walk around ashamed of my hair until it grew out, which wasn’t the case. I just had to experiment with techniques to find a way to make it look alright. I think it took a couple of weeks before I figured it out but in the grand scheme of things that isn’t very long :). And I work from home which means if my hair looks bad, most days nobody other than my partner sees me anyway. Haha!
You put product on AFTER you plop?
I do, yes. My hair holds on to water like crazy, so plopping for a short time before adding my gel or my mousse allows me to ‘damp style’ rather than ‘wet style’. It reduces my drying time if I apply products after my hair has started to dry just a little bit. It also gives me better volume. However, if I were to plop for too long (20+ minutes) before adding products, it would make my hair stringy. So it’s about finding the sweet spot. Also I have tried the occasional gel that really needs to be added to soaking wet hair or it just doesn’t work right. For example, uncle funky’s daughter curling magic will feel like school glue got left in my hair unless I add it when my hair is soaking wet.
I have had a similar bad hair cut and finding it to so hard to style my hair just on the sea salt spray how much do you use do you spray it on or spray into hands I’d like to try this and also have you any other tips to stop your waves at the side of my head from formin into one big huge not nice clump thanks
I’ve tried sea salt sprays but I have not found them to be ideal for getting the results that I want. I generally recommend using a product with more hold such as a gel or a mousse. If you go for a gel that is ‘defining’ and if you scrunch your hair quite a bit after your shower it should break your hair into smaller clumps. If you apply your gel when your hair is in skinnier clumps, and diffuse your hair until it is 100% dry, that should assist you with keeping your clumps smaller.